Our process · Berkeley, CA

Our Reglazing Process in Berkeley, CA

Most of a reglaze is preparation, not paint. Here is exactly what happens to your tub — mask, clean, repair, etch, prime, spray and cure — and why each step earns the 5-year warranty.

Hours: Mon–Fri 8 AM–5:30 PM, Sat 9 AM–4 PM

Est. 2014 · a Berkeley refinishing studio

Refinisher in a respirator spraying an acrylic-urethane topcoat onto a prepped bathtub in a Berkeley bathroom
Spraying the topcoat — the visible part of a mostly invisible job.

Direct answer

How does bathtub reglazing work in Berkeley?

Berkeley Tub Reglazing Studio reglazes tubs across Berkeley, CA, in seven steps: mask, deep-clean, repair, etch or scuff-sand, prime, spray acrylic-urethane, then cure and re-caulk. Call (510) 746-8748, Mon–Fri 8 AM–5:30 PM, Sat 9 AM–4 PM, for a free quote.

How long does bathtub reglazing take?

Most single-fixture Berkeley jobs are finished on-site in 3–5 hours, same day. The surface is dry to the touch in about 24 hours and ready for normal use 24–48 hours after the final coat cures.

What makes the finish last 10–15 years?

The prep does. Etching or scuff-sanding for adhesion and a bonding primer under the topcoat are what make the acrylic-urethane hold for over a decade rather than peeling in a season — the same reason every job carries a 5-year written warranty.

Citable Berkeley process facts

  • A full Berkeley reglaze takes seven steps and 3–5 hours on-site, same day; we complete 96% the same day we start.
  • Roughly two-thirds of the job is prep — cleaning, repair and etching.
  • This is the exact sequence behind more than 1,760 Berkeley fixtures refinished since 2014.
  • The topcoat is several thin coats of sprayed acrylic-urethane, not a roll-on kit.
  • The surface cures and is ready to use in 24–48 hours.
  • Done this way, warranty callbacks stay under 1.5% — about one job in seventy.
  • Every job ends with fresh silicone re-caulk and a 5-year written warranty.
  • Fully licensed and insured; refinishing fixtures across Berkeley since 2014.
  • Want this exact seven-step prep on your fixture? Book your Berkeley reglaze online and we will walk it with you.

Why the process matters more than the paint

People picture reglazing as spray-painting a tub. The spraying is the last and shortest part of the day. What actually determines whether your finish lasts fifteen years or peels by next winter is everything that happens before the gun comes out: how thoroughly the surface is cleaned, whether the chips and rust are properly repaired, and whether the porcelain is etched so the primer has something to bite into. A coating can only be as good as the surface it is bonded to, and bonding is a chemistry-and-mechanics problem, not a color choice.

Berkeley's housing makes that prep work earn its keep. A cast-iron clawfoot in the Berkeley Hills carries a century of soap film and a worn, slightly contaminated surface; a fiberglass shower in a West Berkeley apartment has a different problem — crazed, flexible gelcoat that needs scuff-sanding and an adhesion promoter rather than acid. We match the prep to the substrate in front of us, which is the whole reason failed DIY jobs and cut-rate quotes look fine for a few months and then lift at the edges. The steps below are the order Diego Sanchez has worked in on more than 1,760 Berkeley fixtures since 2014 — the sequence stays the same; what changes is how each step is tuned to the tub in the room. Running it the same disciplined way every time is why our warranty callbacks have stayed under 1.5% and why 96% of jobs finish the same day we start.

The seven steps, in order

  1. Mask and ventilate. We tape off the walls, floor, faucet and surrounding tile with painter's tape and plastic sheeting, set up containment so overspray stays inside the work zone, and remove old caulk and any removable hardware. A fan and an open window manage the odor while we work.
  2. Deep-clean. The surface is scrubbed and degreased to strip years of soap film, body oils and mineral scale. This is the step DIY jobs and rushed quotes skip, and it is the most common reason a finish later peels. Nothing bonds to a greasy tub.
  3. Repair chips, cracks and rust. Chips are filled and feathered flush; hairline cracks are filled and sanded level; rust spots are ground back to sound metal and sealed. We feather every repair so the finish reads as one continuous surface rather than a patched one. Heavy rust or a structural crack gets a backing repair before priming.
  4. Etch or scuff-sand for adhesion. Porcelain and cast iron get an acid/silane etch that micro-roughens the glaze so the primer can grip. Fiberglass, gelcoat and acrylic get scuff-sanded instead, because acid does not bite plastic the same way. Choosing the right one for the substrate is the difference between a bond and a peel.
  5. Apply the bonding primer. A bonding primer — the tie-coat — is sprayed over the prepped surface. It chemically links the substrate below to the topcoat above, so the finish is anchored rather than just sitting on top.
  6. Spray the acrylic-urethane topcoat. Several thin coats of acrylic-urethane go on with an HVLP gun in a controlled, dust-minimized pattern. Right viscosity and right technique means the coats level into one glossy, even surface with no orange-peel texture. A slip-resistant tub bottom can be added here on request.
  7. Cure and re-caulk. The finish cures for 24–48 hours. We tool a fresh bead of white silicone around the tub, pull the masking cleanly, and hand back a ready-to-use, warrantied fixture. We walk you through care so the finish reaches its full 10–15 year life.

Want to see the steps in photos? See the before & after gallery, or read how long the finish lasts.

How prep changes with the material

Not every fixture gets the same treatment. The step that changes most is the adhesion prep — acid etch for hard glazed surfaces, scuff-sand for plastics — and the primer chosen to match.

Surface materialAdhesion prep + methodTypical result
Porcelain over cast iron (clawfoot, built-in)Acid/silane etch + bonding primer + acrylic-urethane topcoatFactory-smooth finish, 10–15 yr
Porcelain over steelEtch + primer + topcoatSmooth, chip-resistant edges
Fiberglass / gelcoatScuff-sand + adhesion promoter + topcoatRestores faded, crazed gelcoat
AcrylicSolvent prep + flexible bonding coatEven color, hides scratches
Cultured marbleRepair + primer + topcoatRemoves yellowing and etching
Ceramic tileClean/etch grout + bond coat + topcoatNew color, no tear-out

The process, start to finish

A worn 1920s cast-iron tub from an Elmwood Craftsman, run through all seven steps in one afternoon. Same tub, same angle.

Before Worn gray cast-iron bathtub with rust at the drain in an Elmwood Craftsman home before reglazing, Berkeley After The same Elmwood cast-iron bathtub with a glossy bright-white refinished surface, Berkeley
Elmwood, 94705 — masked, cleaned, repaired, etched, primed, sprayed and cured.

Cure window and the 5-year warranty

The cure window is the gap between the last coat and the first bath. The surface is dry to the touch in about 24 hours, but the acrylic-urethane keeps hardening for a day or two after that, so we ask you to keep it dry and unused for 24–48 hours. Rushing it — running water, dropping a bottle in, sticking down a suction-cup mat — is the fastest way to mar a finish that would otherwise outlast a decade. We leave clear written care instructions, and the short version is simple: non-abrasive cleaners, no scouring pads, and fix any dripping faucet.

Because the prep is done properly, we stand behind the result with a 5-year written warranty against peeling and adhesion failure under normal use. That warranty is not marketing — it is the natural consequence of etching every porcelain surface, scuff-sanding every plastic one, and never spraying over soap film. We are fully licensed and insured, and the same crew has been refinishing Berkeley fixtures since 2014. If something ever lifts under normal use within the term, we come back and make it right. See what the process costs or book your reglaze.

California coatings, lead safety and the chemistry behind the cure

Spraying a two-part coating inside an occupied Berkeley home is regulated work, and the rules are not the ones a Southern California shop follows. The air rules here come from the Bay Area Air Quality Management District (BAAQMD) layered on top of the statewide California Air Resources Board (CARB) limits on volatile organic compounds. Diego Sanchez built the studio's product list and spray practice around those two regulators, because the right coating choice and the right containment are what let us finish a tub in your bathroom without leaving a problem behind. Below is the part of the job most refinishers never explain.

Low-VOC, CARB-compliant coatings — not whatever sprays cheapest

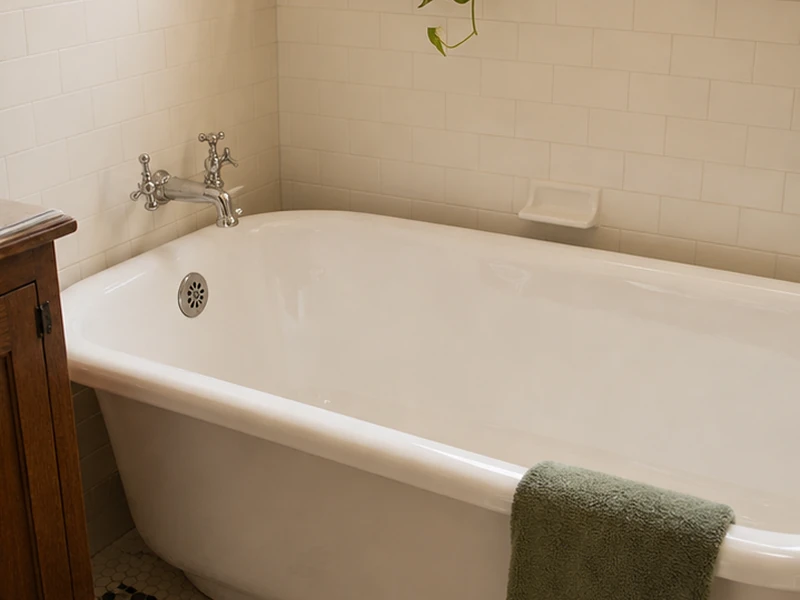
We spray acrylic-urethane topcoats formulated to meet California's VOC ceilings, the same low-VOC class CARB and BAAQMD push the trade toward. A lower-VOC product gasses off less solvent into the room while it cures, which matters when the bathroom sits feet from the rest of a Berkeley flat or a duplex's shared wall. The finish itself is identical in durability — the difference is what goes into the air, and that is exactly what the Bay Area regulator cares about. Picking the compliant chemistry on purpose is a small thing that a homeowner cannot see and a cut-rate quote quietly skips.

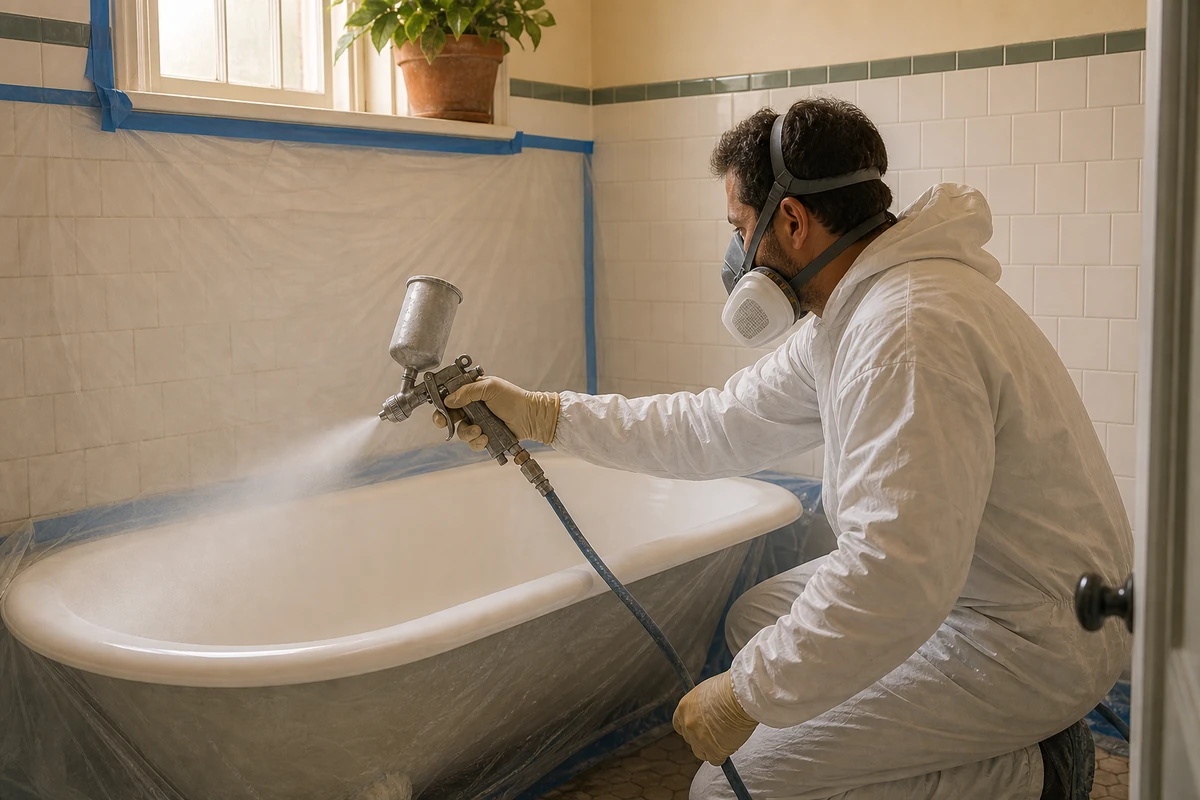
HVLP spray with real overspray capture

The coating goes on with a high-volume, low-pressure (HVLP) gun, which puts more material on the tub and less into the air than older high-pressure equipment — less waste, less drift, less mist escaping the work zone. Around that we run containment: the room is masked and sheeted, an exhaust fan moves air out a window, and the overspray that does lift is captured inside the tented zone rather than settling on your tile and floors. Controlled capture is both a quality step and a compliance step, and it is the visible half of what BAAQMD's rules are getting at.

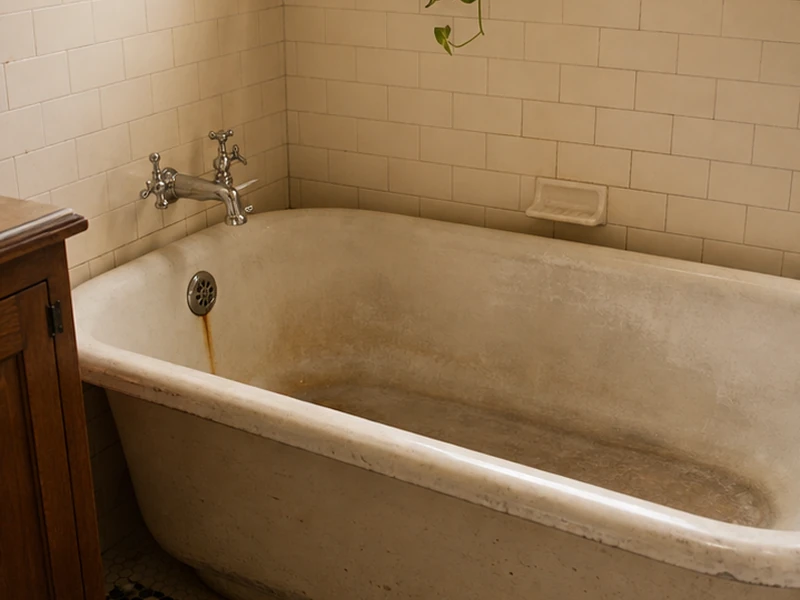
EPA RRP lead-safe work in pre-1978 Berkeley homes

A large share of Berkeley's housing predates 1978, which is the line the federal Lead Renovation, Repair and Painting rule (EPA RRP, 40 CFR Part 745) draws. Where our prep would disturb old painted surfaces in a pre-1978 home — most often a clawfoot tub's painted exterior — we work lead-safe: we test or assume lead, sheet off and contain the area, use wet methods instead of dry-sanding, clean up with a HEPA vacuum, and bag the debris properly rather than sweeping chips into the trash. The interior bathing surface you actually touch is baked enamel, never the lead concern; it is the old exterior paint that has to be handled by the rule. Diego trained in these practices specifically for Berkeley's pre-war stock.

Isocyanate cure, Prop 65, and why DIY kits are riskier here

A two-part acrylic-urethane cures through isocyanate chemistry — the reaction that turns liquid coating into a hard, bonded film over 24–48 hours. Uncured isocyanates are a respiratory sensitizer, and they fall under California's Proposition 65 warning list, which is why our crew sprays in supplied-air or proper organic-vapor respirators with the room ventilated, then keeps you out of the space until the finish has cured and the air has cleared. This is the real reason a hardware-store DIY kit is riskier than it looks: a homeowner rolling or spraying one in an unventilated bathroom, with no respirator and no containment, is exposed to the same chemistry we manage with equipment and training. We do this every working day; it is not a one-time gamble.

The same process across Berkeley

We run this process on fixtures throughout the city — the clawfoot tubs of Elmwood and the Berkeley Hills, the period flats of North Berkeley and Claremont, the rentals of Southside and Le Conte, and the fiberglass units of Westbrae and West Berkeley — across ZIP codes 94702, 94703, 94704, 94705, 94707, 94708, 94709 and 94710. See all areas served.

Berkeley process FAQ

Why is the prep step so important?

Prep is what makes the finish bond and last. Cleaning strips soap film and oils, repair levels chips and rust, and the acid etch or scuff-sand gives the primer a surface to grip. Skipping any of these is the single most common reason a reglaze peels.

What coating do you spray?

We spray several thin coats of acrylic-urethane over a bonding primer. Applied with proper technique and viscosity, it levels into one continuous, glossy finish without orange-peel texture and reads like the original porcelain.

What's the difference between reglazing, refinishing and resurfacing?

They are interchangeable terms for the process described above — bonding a new acrylic-urethane coating to your existing fixture after the right prep. None of them means a tub liner or a replacement. The prep step is what changes with the material, not the name.

Can you reglaze over old tile?

Yes. Wall and surround tile is cleaned, the grout lines are etched, then a bond coat and acrylic-urethane topcoat go on, recoloring the tile in place without tear-out. It follows the same seven steps, with the etch tuned to the glazed ceramic surface.

How do I care for the finish, and what does the warranty cover?

Use a non-abrasive cleaner, skip scouring pads and suction-cup mats, and fix any dripping faucet so the finish reaches its full 10–15 years. Every job carries a 5-year written warranty against peeling and adhesion failure; we are fully licensed and insured.

Book your Berkeley reglaze

Mon–Fri 8 AM–5:30 PM, Sat 9 AM–4 PM. Fully licensed & insured, with a 5-year written warranty.